
In the dynamic world of photography, mastering the art of photo editing is a game-changer. Whether you’re a professional photographer or an amateur enthusiast, having access to the right tools can elevate your images to new heights. In this article, we’ll explore the world of photo editing, focusing on the best free apps that can transform your snapshots. From headshot photography techniques to the magic of before-and-after retouching, we’ll cover it all.

Capturing the essence of a person in a single frame requires skill and precision. Learn the nuances of headshot photography techniques that bring out the unique personalities of your subjects. From lighting tricks to framing secrets, discover how to make your headshots stand out.
Before diving into the world of photo retouching apps, it’s essential to understand the basics. Explore the fundamental techniques that every photo editor should know. From adjusting exposure to refining composition, these skills form the foundation for impeccable photo retouching.
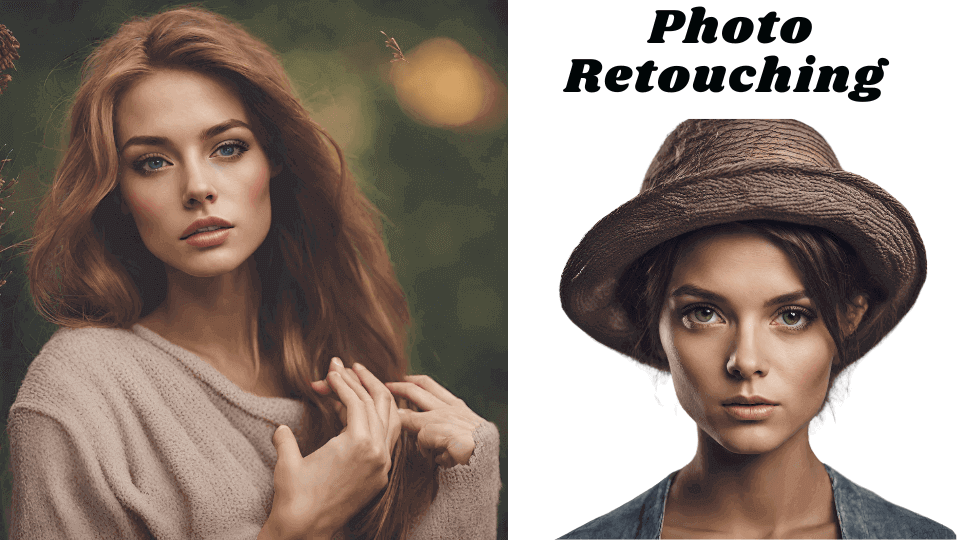
Before and After Photo Retouching
Witness the transformative power of photo retouching through captivating before-and-after examples. Gain insights into the subtle adjustments that can turn an ordinary photo into a stunning masterpiece. Learn how to enhance colors, remove imperfections, and add that extra touch of magic.
Delve into the artistic side of photo retouching and discover how it can enhance the natural beauty of your subjects. Uncover the secrets behind creating images that not only look stunning but also evoke emotions and tell a compelling story.
Cost of Photo Retouching:
While we focus on free photo editing apps in this article, it’s worth understanding the cost dynamics of professional photo retouching services. Learn when it makes sense to invest in professional retouching and how it can save you time while delivering exceptional results.
In a world where visuals play a crucial role, mastering photo editing is a valuable skill. By incorporating the best free photo editing apps into your toolkit and understanding the intricacies of headshot photography techniques and retouching basics, you’re well on your way to creating stunning visuals. Unleash your creativity, experiment with different tools, and watch as your images come to life with the magic of photo editing.
Headshot Photography Techniques
The purpose of headshot photography is to portray individuals in their best light, quite literally. In a world where first impressions frequently occur online, a well-crafted headshot makes a positive impression. Photographs capture more than just a person’s face; they convey the essence of their character, emphasizing professionalism, approachability, and authenticity.
Key Elements of Capturing Striking Headshots
Achieving striking headshots requires an understanding of and implementation of key elements. Here is a breakdown of key points to keep in mind:
Lighting Techniques: In headshot photography, lighting plays a significant role. Natural light, studio lighting, or a combination of both can produce a variety of visually appealing results. Use soft, diffused lighting to minimize harsh shadows and emphasize facial features naturally.
a. Natural Expression: Allow your subject’s natural expressions to reveal their personality. Encourage authenticity over forced smiles or overly serious expressions.
b. Posture Matters: Maintaining good posture not only enhances the overall look but also demonstrates confidence and professionalism.
c. Eye Contact: Direct eye contact establishes a connection between the viewer and the subject. Ensure the eyes are well-lit and convey the intended emotion.
d. Experiment with Angles: Explore different angles to find the most flattering perspective. Sometimes, a slight tilt of the head or a change in camera angle can add depth and interest to the headshot.
e. Background Consideration: Select a background that complements the subject without distracting from its features. A neutral background, or one related to the subject’s profession, often works well.
By integrating these elements into your headshot photography, you can capture images that not only meet technical standards but also resonate emotionally, making them truly striking and memorable
Photo Retouching Basics
Photo retouching is a transformative art that goes beyond merely editing images. It involves the enhancement and correction of photographs to achieve a desired aesthetic. Demystifying photo retouching requires understanding its purpose—to refine and improve the visual appeal of an image. It’s not about distorting reality but rather accentuating the inherent beauty within a photograph.
In essence, photo retouching involves delicate adjustments, such as refining skin textures, correcting lighting issues, and emphasizing key elements. The goal is to create a polished and visually pleasing image that resonates with the viewer.
Essential Tools and Software for Beginners
Embarking on the journey of photo retouching as a beginner requires familiarity with the essential tools and software. Here’s a comprehensive guide to get you started:
1. Overview of Popular Photo Retouching Software: Adobe Photoshop
Undoubtedly, Adobe Photoshop stands as a powerhouse in the realm of photo retouching. It offers a myriad of tools for detailed editing, from blemish removal to intricate color adjustments. Its versatility makes it a top choice for professionals.
Lightroom: Adobe Lightroom is a user-friendly option, particularly for beginners. It focuses on quick and efficient photo enhancement, offering tools for exposure adjustments, color correction, and easy organization of your photo library.
GIMP (GNU Image Manipulation Program)
As an open-source alternative, GIMP provides a range of features comparable to commercial software. It’s a great choice for those on a budget, offering tools for retouching, editing, and enhancing images.
Basic Steps in Photo Retouching
Import and Organize: Begin by importing your image into your chosen software. Organize your workspace to streamline the editing process.
Color Correction: Adjust the color balance, saturation, and contrast to enhance the overall appearance of the image. Ensure natural-looking tones and vibrant colors.
Blemish Removal: Use tools like the healing brush or clone stamp to remove imperfections, blemishes, and distractions from the photo.
Skin Retouching: For portraits, focus on refining skin textures while maintaining a natural look. Soften skin tones, reduce wrinkles, and enhance facial features.
Final Touches: Fine-tune details, sharpen important elements and apply any additional enhancements needed. Pay attention to the overall composition and balance.
By grasping the fundamentals of photo retouching and familiarizing yourself with the essential tools and software, you’ll be well-equipped to embark on your journey to create visually stunning and professionally retouched images.
Before and After Photo Retouching
The transformative power of photo retouching is nothing short of magical, turning ordinary images into captivating visual narratives. This process transcends mere editing; it’s an art form that breathes life into photographs, revealing their hidden
potential. By showcasing the transformative power of photo retouching, we unlock the ability to elevate images beyond their initial state.
Photo retouching can bring out the vibrancy of colors, highlight intricate details, and create a harmonious balance between elements. It goes beyond correction; it’s about enhancing the essence of a photograph, allowing its true beauty to emerge. Whether it’s a portrait, landscape, or product image, the transformative power of retouching can make the ordinary extraordinary.
Real-Life Examples of Before and After Retouching
To truly understand the impact of photo retouching, let’s explore real-life examples of before and after retouching
Before: A portrait may start with minor imperfections, uneven skin tones, and distracting background elements.
After:Through retouching, blemishes are smoothed, skin tones are refined, and the background is subtly blurred to direct attention to the subject’s features. The result is a polished and professional portrait.
More Example Landscape Elevation
Before: A landscape photo may lack the vibrant colors and sharpness needed to convey its natural beauty.
After: Through retouching, colors are enriched, contrast is adjusted, and details are brought to life. The transformed image transports viewers to the picturesque beauty of the landscape.
In these real-life examples, the impact of photo retouching becomes evident. It’s not about altering reality but enhancing it, allowing the essence of the subject to shine through. These before-and-after comparisons serve as a testament to the artistry and skill involved in the transformative journey of photo retouching.
The Beauty of Photo Retouching
Photo retouching, when executed with finesse, transcends the realm of mere editing and enters the domain of artistry. It involves a delicate dance between technical skill and creative vision, where the retoucher becomes an artist, sculpting the visual narrative within the frame. Appreciating the artistic aspect of photo retouching involves recognizing it as a medium for self-expression and storytelling.
In the hands of a skilled retoucher, an image transforms into a canvas waiting to be painted. The play of light and shadow, the subtle enhancement of features, and the meticulous attention to detail all contribute to the creation of a visual masterpiece. The artistic aspect lies not only in correcting flaws but in elevating the photograph to evoke emotions and resonate with the viewer on a deeper level.
Balancing Realism and Enhancement in Retouching
The beauty of photo retouching lies in its ability to strike a delicate balance between realism and enhancement. It’s an intricate dance where the goal is not to create a flawless illusion but to enhance the inherent beauty of the subject while preserving authenticity. This delicate equilibrium ensures that the final result feels both polished and genuine.

Realism: Retouching respects the authenticity of the original image. It acknowledges and retains the natural features, textures, and nuances that make the subject unique. Realism in retouching involves enhancing without distorting, creating a final image that still feels true to life.
Enhancement: On the flip side, enhancement is about elevating the visual appeal. It involves refining details, optimizing colors, and bringing out the best in every element within the frame. The goal is to present the subject in the best possible light without veering into the territory of artificiality.
Finding Harmony: True beauty emerges when realism and enhancement harmonize seamlessly. Skin textures are refined, colors are vibrant yet true to the scene, and the overall aesthetic is enhanced while preserving the genuine essence of the subject. This synergy results in a visually striking image that captivates without betraying the reality it portrays.
Appreciating the beauty of photo retouching requires recognizing it not only as a technical process but as a form of visual poetry. It’s an art form that celebrates the inherent beauty in every photograph while allowing room for creative expression and enhancement.
Photo Retouching Apps
In an age where visual content holds immense importance, having access to powerful yet free photo retouching apps is a valuable asset for both enthusiasts and professionals. Let’s explore and evaluate some of the top contenders in the realm of free photo retouching apps:
1. Snapseed
- Pros:
- A comprehensive suite of editing tools, including precision filters and brushes.
- Non-destructive editing allows for experimentation without compromising original quality.
- User-friendly interface, making it suitable for beginners.
- Cons:
- Lacks some advanced features found in professional-grade software.
2. VSCO
- Pros:
- Offers stylish filters and presets for quick and aesthetically pleasing edits.
- Simple and intuitive user interface.
- Functions as a social platform for sharing edited images.
- Cons:
- Limited advanced retouching tools compared to more complex applications.
3. Lightroom Mobile
- Pros:
- Professional-grade editing tools, including advanced color correction and tone adjustments.
- Seamless integration with Adobe Creative Cloud for cross-device editing.
- Efficient presets for streamlined editing workflows.
- Cons:
- May have a steeper learning curve for beginners compared to simpler apps.
4. Pixlr
- Pros:
- Boasts a robust set of editing tools, including layers and advanced adjustments.
- User-friendly interface suitable for both beginners and intermediate users.
- Offers a wide range of filters and effects.
- Cons:
- Ad-supported model, which may be intrusive for some users.
5. Prisma
- Pros:
- Unique artistic filters inspired by famous artists for turning photos into artworks.
- Easy-to-use interface, making artistic transformations accessible.
- Social sharing features for displaying edited images.
- Cons:
- Limited to a specific artistic style, may not suit all types of photos.
Features to Look for in a Photo Retouching App
Choosing the right photo retouching app involves considering a variety of features to ensure it aligns with your editing needs. Here are some essential features to look for in a photo-retouching app:
1. User-Friendly Interface
- An intuitive layout and easy navigation for a seamless editing experience.
2. Basic Editing Tools
- Fundamental tools like crop, rotate and straighten are used for basic adjustments.
3. Retouching Tools
- Specific tools for tasks like spot healing, blemish removal, and skin smoothing, especially for portrait enhancements,.
4. Filters and Presets
- A diverse range of filters and presets for quick and creative edits.
5. Advanced Editing Capabilities
- Tools for color correction, tone adjustments, and exposure control for more advanced editing.
6. Non-Destructive Editing
- The ability to edit without compromising the original image quality.
7. Social Sharing Integration
- There are convenient options for sharing edited images on popular social media platforms.
8. Compatibility
- Cross-device compatibility to ensure a consistent editing experience across various platforms.
By evaluating these top free photo retouching apps and considering these key features, users can make informed decisions based on their skill level, editing preferences, and the specific enhancements they aim to achieve in their photos.
Delving into Advanced Techniques
Adobe Photoshop stands as a powerhouse for photo retouching, offering a plethora of advanced techniques to elevate your images. Let’s delve into some of the more sophisticated approaches that can transform your photo retouching process:
1. Frequency Separation
- Purpose: Separating texture and color to work on each independently.
- Technique: Create high- and low-frequency layers, enabling precise adjustments to skin texture without affecting color tones.
2. Dodge and Burn
- Purpose: Enhancing highlights and shadows for more depth and dimension.
- Technique: Use the dodge tool to lighten areas and the burn tool to darken, selectively emphasizing or de-emphasizing specific regions.
3. Custom Brushes
- Purpose: Add intricate details or effects.
- Technique: Create or download custom brushes for tasks like adding realistic freckles, enhancing hair details, or creating artistic effects.
4. Curves Adjustment Layers
- Purpose: fine-tune brightness and contrast.
- Technique: Adjust the curve for highlights, mid-tones, and shadows separately, achieving precise control over tonal ranges.
5. Smart Objects and Smart Filters
- Purpose: Maintain non-destructive editing capabilities.
- Technique: Convert layers to smart objects, allowing you to apply filters non-destructively and make adjustments at any point in the editing process.
Step-by-Step Guide to Photo Retouching Using Photoshop
Embarking on a photo-retouching journey in Photoshop involves a series of strategic steps. Here’s a step-by-step guide to guide you through the process:
Import and Organize: Open your image in Photoshop and organize your workspace for an efficient workflow.
Duplicate the background layer: Right-click on the background layer and choose Duplicate Layer to create a copy, preserving the original.
Basic Adjustments: Use adjustment layers (levels, curves, and saturation) to make initial corrections to exposure, contrast, and color balance.
Frequency Separation: Create high- and low-frequency layers. Work on the low-frequency layer for color corrections and the high-frequency layer for detailed texture adjustments.
Dodge and Burn: Create a new layer set to overlay blending mode. Use the dodge tool to lighten areas that need emphasis and the burn tool to darken areas for depth.
Skin Retouching: Address blemishes using the Spot Healing Brush tool. Use the Healing Brush tool for more complex corrections.Consider using the clone stamp tool for specific areas.
Fine-tune with Curves: Use additional curve adjustment layers to refine highlights, midtones, and shadows.
Smart Objects and Filters: Convert layers into smart objects to maintain flexibility. Apply smart filters for additional effects or corrections.
Final Touches: Add any remaining details, such as sharpening specific areas or enhancing specific features.Check the overall composition and make any final adjustments.
Save and Export: Save your work and export the final image in your desired format.
By studying advanced techniques and following this step-by-step guide, you can harness Photoshop’s full potential in photo retouching, communicating with precision and accuracy to achieve professional-quality results.
